Read this first
This guide is intentionally simple. Follow it exactly for stable audio.
Two rules that matter most
- Ethernet only. Do not broadcast over Wi-Fi.
- Use a mixer. Strongly recommended for clean, consistent volume.
Before opening a support ticket
Many common questions and issues are already answered in our documentation. Please check the following first:
- This Broadcasting Guide - especially the sections on Ethernet, mixers, testing, and common problems.
- The FAQ page - playback, archives, scheduling, and known limitations.
If you still need help after reviewing those:
- Go to the Home page.
- Open the menu (top-right).
- Select Support and submit a ticket.
This helps us respond faster and focus on real issues.
Critical requirements
1) Wired internet (Ethernet only)
- Do not broadcast over Wi-Fi.
- Wi-Fi causes dropouts, delay, and unstable audio.
- If you’re on Wi-Fi: stop, plug in Ethernet, then try again.
2) Audio mixer (highly recommended)
- Any microphone type is supported.
- A mixer gives stable volume and reduces distortion.
- Without a mixer, audio is often quiet, harsh, or uneven.
Recommended equipment
- Microphone (any supported)
- Audio mixer (USB or analog)
- Ethernet cable (direct to router/switch)
- Stable internet (minimum 1 Mbps upload)
- Headphones (recommended for quick monitoring)
How to broadcast
- Open the broadcasting page
- Use a computer, tablet, or phone.
- Confirm Ethernet is connected.
- Allow microphone access in your browser.
- Enter the required info
- Colony name
- Description
- Password
- Same password for all authorized broadcasters.
- If you don’t have it, open a Support ticket from the home page and choose Password request (or “Support” if you haven’t added that option yet).
Testing (required)
Always test first. This prevents failed broadcasts and listener complaints.
- Set Colony Name to test.
- Speak for 10–20 seconds.
- Confirm:
- Audio is clear
- No cutting out
- Ethernet is connected
- If it fails:
- Adjust mic / mixer levels
- Check mic connection
- Confirm Wi-Fi is off and Ethernet is plugged in
Go live
- Enter your real Colony Name.
- Click Start Broadcasting.
- Speak clearly and keep levels steady.
- Do not unplug Ethernet or change networks.
Public vs private broadcasts
Public
- Visible on the listeners page
- Automatically archived
- You receive a copy
Private
- Hidden from the listeners page
- Not publicly archived
- You still receive a copy
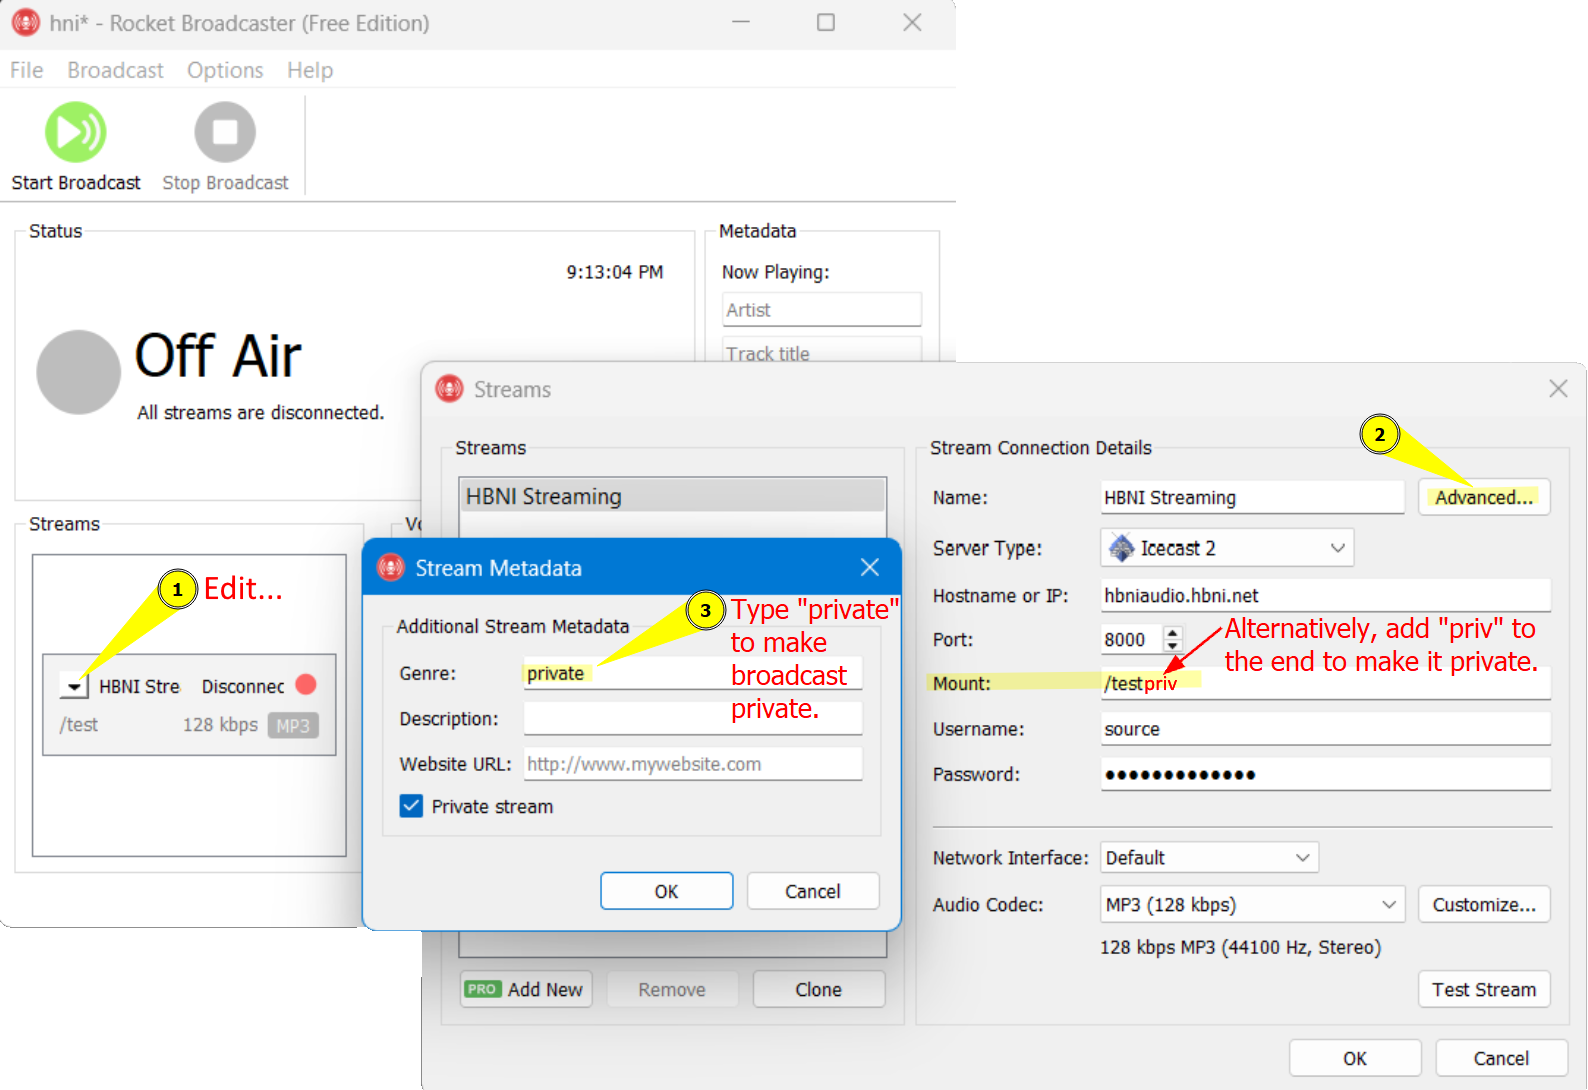
Rocket Broadcaster
If you use Rocket Broadcaster, here are examples of the setup and private options.

Common problems
- Audio cutting out → network issue (usually Wi-Fi).
- Quiet or distorted audio → mixer levels / mic setup.
- Listener complaints → audio quality too low or unstable.
Fast fix
Use Ethernet. Use a mixer. Test first.